5 Steps to Take Your Blog Photos from Shoot to Blog…times 2
There are some stunning blog photos online.
In fact, professional-level images are becoming the standard for blog photos.
Seriously. With the fancy DSLR cameras out there, and the ability we have to learn almost any skill we want from our desktop computer (or smartphone), the online world is getting pretty darn…well…pretty these days.
The problem is that taking blog photos isn’t always such a snap (pun!) for those of us without the skills or equipment to compete with the fancy-pants-pros out there.
Click to Tweet: The good news is that blogging isn’t a competition. It’s a conversation & we can all learn from each other.
That’s why I invited my photo-pro buddy, Sarah Shotts from Love letter to Adventure, to join us for a couple posts in the #BlogYourVoice series. She’s here to share some pro-perspective on blog photography to us fakers, and I’m here to…well…tell you how I fake it.
Because I am no pro photographer, kitten.
I don’t even have a camera! I use my iPhone camera for almost all of my photographs here. You know there’s always a long list of things we need to learn and equipment to buy…and sometimes we just have to fake it ’til we make it.
So between Sarah’s pro-tips & my faker-tips, you should be able to piece together your own blog photo workflow from this post.
Let’s start with my faker-pants workflow for photoshoots here, in the With a K office (hint – it’s super easy).
Kris’s Amateur Tips & Workflow for Snapping Branded Blog Photos:
I am a total photography amateur, and my illustrations (though I adore them) are at the beginning of a very long learning curve too.
But I like my blog images. Seriously! I’m ok with the fact that I don’t have as many pictures in each post as some people; I’m ok with the fact that my doodles aren’t as detailed or textured as real artists’ work, and I’m ok with the fact that my photos (when I have any) were taken with my trusty iPhone.


Because I make sure that they all at least follow some simple steps on their way to the blog, and those steps make the process less scary for me – and they make the end result more professional looking and on brand too.
Here’s my Workflow:
1. Follow an Editorial Calendar & shoot my photos by Series or Segment.
I need a plan, kitten. I need a plan for stuff I excel at, and I need one even more for the things I struggle with…like photos.
I know what kind of subjects I’ll be writing about ahead of time.
Because I have a solid (but flexible) editorial calendar based on the products I’m launching & what my readers want to read about during the year.
I mentioned this last week, when we were talking about sorting our photos by categories. If you missed it go check it out, because Sarah is a genius, and she gave us some killer advice for organizing our photo archive.
I’ll get into editorial planning next week, so if that’s something you haven’t handled yet – have no fear! The BizKitten Printables Fairy will be here with a purrrrfect planner, and I’ll be laying down my planning process too.
Make sure you don’t miss it. Sign up for weekly With a K Tips & Tricks in your inbox: pop your name and email into the green box in the sidebar above my big ole face & I’ll send you weekly posts and freebies.
2. Set up branded photo props on or in front of a pretty background, in natural light.
This can take some time to find your style. Experiment and have fun, kitten. It’s your blog, and it’s meant to feel good.
I have different props and dye-cuts in my basket, based on the types of things I write about regularly and what I know is coming up in my editorial calendar….and because they’re cute. The cute factor is actually very important in the prop-vetting process.
A Note on Branded Photos, Inspiration & Hair-ography:
I’m not sure if you saw this Glee episode, but it’s a perfect explanation of how I make my shots feel more pro & on brand. Basically, the Glee kids met another group of singers who danced in a particular way: with all kinds of whipping hair & distraction.
It didn’t work for the Glee kids, because they’re pro vocalists & don’t need that kind of flash to make a stunning show…but as we all know, I am not a pro with the photos, right? So I whip my hair back & forth by using branded props, cute kittens and interesting subjects for every shot.
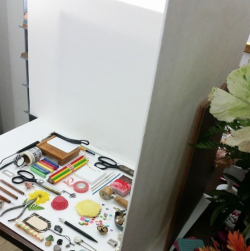
I use white project boards from the Dollar Store to set up my shots in natural light, and then I grab some scrapbook papers in one of my brand colours to use as the background.
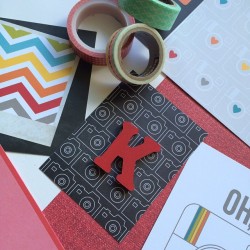
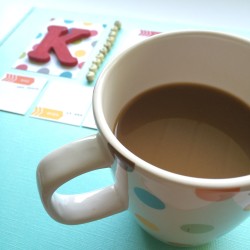
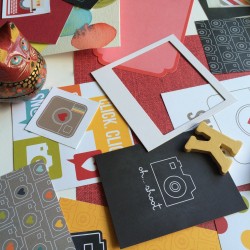
Then, I arrange small props, dye cut images and my own printed logos on the pretty surface, and shoot away. I add in bits of things I use in my office & other props I’ve made or found that go with the theme of the blog series or segment I’m shooting for.
You can see some examples of those kinds of images below, along with a shot from a friend of mine – Nancy Gaines from Domesticraft – that show how this kind of bootstrap photoshoot looks.


I make my own BizKittens and a lot of the clipart I use in Adobe illustrator. If you’re not into illustrator, you can purchase clipart sets from sites like Creative Market that go with your own brand (or have your designer make a few extra clipart bits & pieces) – and lots of craft stores have dye cut packages in different shapes, styles & colours.
Get creative & create a space to collect & keep your branded photo props, but stay within your brand!
This can become a slight obsession, so beware. If you’re not careful, you may start putting your own kids to work to make polymer mini typewriters that match your clipart images.
3. Take a series of photos from different angles
Be patient, explore & have fun with this step. I trip over some of the most lovely shots quite by accident: during the messy set up stage or when I try totally bizarre angles & close-ups.
With digital cameras, we can afford to take a zillion photos in one shoot & just toss the ones we don’t love without any concern for developing costs or time.
So go for it! Take a zillion.
This is one of the most important things we fakers can do, because we don’t really know how to make the perfect shot on purpose. We just need to simply take so many awful ones, that the odds of a beauty-by-mistake are high.
4. Cull the nasties!
What happens when you take a zillion photos during a shoot? A lot of them suck, and that’s ok.
Get rid of all of those nasty, useless photos with bad shadows and weird, uncomplimentary angles. You don’t need to keep them just in case. That’s why you took a zillion in the first place, so just toss the baddies.
5. Polish the beauties.
I do verrrrrry basic colour balancing and clipping. That’s it. Sarah’s tips have more about this step, so scan on down to that, if it’s something you’re ready to learn about now.
If you’re cool with being a faker, just use your basic photo-editing software to make the gems you stumbled upon in your photoshoot even more shiny.
Let it be not perfect. The only way you can get better at this stuff is to start as a beginner & practise as you go. Your readers will forgive you for your learning.
6. Make them blog ready.
I resize my photos and add any words or effects as I go…and it takes a lot of time to do that way. I’m taking some of Sarah’s tips to heart & I’m going to start batching the featured images and illustrations I add to each post.
Those featured images (the one you see at the top of each of my posts) are generally very similar to one another. I have room for a headline and my web address on them. I also make space for a hashtag, to showcase the series or segment that the post belongs to.
Then, I grab an illustration and a banner image and plop them right into the Illustrator template I’ve made, and save that bad boy as a png file. Ta Da!
Sarah’s Pro Tips & Workflow to get your Photos from the Shoot to your Blog:
So we talked, last week, about how to set up an archive to sort and keep your photos in a way that will make it easier for you to find the perfect picture for your posts without doing a photoshoot every week.
This week, I decided to share Sarah’s workflow for batch-editing her photos – instead of doing one here and one there, as you need them.
Batching your work is a way to make efficient use of your time, and it’s a game-changer for all kinds of entrepreneurial tasks – particularly blogging.
So let’s take a look at Sarah’s workflow for batching her photoshoots & editing – to save time and prepare lots of archived photo-gold for future posts.
Q: How do you plan ahead & do you batch your photos to save time?
A: I didn’t always have a process for batch editing my photos. I used to sit down and edit one photo at a time for hours on end. This meant I often wasted lots of time editing a specific photo only to find I liked the next one better.
Creating a workflow for photo editing really streamlined my process. It saves me time and makes my style more consistent.
Here’s how my workflow goes:
1. Archive Photos
First I download the photos to my computer and put them in my photography archive (we talked about this last week).
2. Review Photos
This is the step that saves a lot of time. Rather than editing every photo, I review all of them and mark my favorites. I keep the main purpose of the photos (a blog post, photo gallery or social media) in mind as I review. I also mark photos that I may not want to use right away, but could come in handy in the future (like my own personal library of “stock photos”).
3. Developing
This step may vary depending on your camera and the settings you use, but the same principles apply. I usually shoot with my DSLR in RAW (a kind of digital negative) so I develop my files using Adobe Lightroom.
Whatever software you use (from Lightroom to Picmonkey) this step is when you edit for brightness, contrast, and color correction. All of the basics.
4. Processing
This is the part where you add any fancy effects. I usually add a subtle film grain using Alien Skin Exposure software. Sometimes I’ll turn photos black and white in this step as well. I have presets and can apply them to several photos at once, which saves time.
5. Finalizing & Resizing
The last step is to finalize the photos and resize them for your blog and social media. I do this step in Adobe Photoshop because it allows me to create presets called “actions”. (Learn how to create PS Actions here.) I have different resizing presets for my blog and for social media.
If I only want to resize a handful of photos I do this manually. If I want to resize a lot of photos I use Photoshop’s Image Processor to resize a whole folder at once (you can learn that trick here).
Wow! Great tips from Sarah, right?
I’m changing my workflow up a lot, form here on out, to batch more of the repetitive tasks involved in making blog photos and images. I think these organizational & streamlining tricks can be a game changer for my own blog images.
What do you think? How will you start batching your image-creation tasks? What kinds of branded props will you start to collect?
Get creative, have fun & get more efficient! Your blog can be full of really great images, and you don’t have to spend your whole day (or week) getting them ready.
See you next week! We’ll be talking about editorial calendars and blog topic planning, so if you don’t want to miss that – sign up for the With a K Tips & Tricks in your inbox (your your name and email in the green box in the sidebar, above my big ole face).
xo
Kris
You mad? Excited? Have a perspective to share? Please do!
16 Comments
Leave a Comment
Want to read more? Check out these recent articles.
The 5 Steps to Make Writing more Free, Fun and Effective
Taking Apart the Writing Process: What does it actually look like? Well…it doesn’t really look like this layout of the insides of a typewriter, but looking at any complicated thing in pieces is the best way to make certain that all of the parts are there – and working well. I talked a little bit…
Stop, Right Now! This One Thing Will Change the Way You Write Forever:
How is Your Blog Writing Going, Today? Are you sitting in front of your computer, with a cup of coffee in your hand and one of the best seats at Starbucks, only to stare at the blinking cursor on your screen – your fingers paralyzed on the keyboard? Or do you prefer to sit outside in the sun…


[…] 5 Steps to Take Your Blog Photos from Shoot to Blog. […]
This post was full of great tips! I use a lot of photos on my blog (naturally) and I’ve found that having lots of photos to choose from has made it easier for me in the end. Take lots more photos than you think you’ll need, too! One or two pics and your done doesn’t cut it – at least not for me. I’m usually not satisfied with the results and have to re-do them.
Thank you, Kris and Sarah, for sharing your process!
Thanks Erika!
You are totally right. The more photos I take, the more likely I am to find a lovely shot, AND the more photos I have, the more likely I will be able to find the perfect shot later…without needing to take a whole photoshoot to get it.
xo
K
These tips are great. Thanks to you and Sarah for sharing the information. I definitely need to do better with my original photos on my blog. I’ve got homework after reading this awesome post.
Thanks Ramona,
Homework is always good 🙂 I have lots too; I’ve learned a lot from Sarah, these past few weeks. Thanks for commenting, and sharing too!
xo
K
I am so excited to learn how to batch crop my jewelry photos!! I always crop them the same size, so processing them all at once will save me a ton of time. Wahoo!!
Sarah’s got a lot of great resources here, right?
I can’t wait to get into photography more & start to use them too. Keep us posted on how it works out for you, Trish!
xo
K
Great article! It inspired me to start looking for a new camera in earnest. My eight year old point-and-click is held together with duct tape, the cord no longer works, it loses focus sometimes, it has stopped taking decent low-light pics… and my sweetheart tried to drown it in prosecco at Easter so the lens shutter thingy gets stuck. Or is hungover 😀
It hadn’t occurred to me to incorporate my brand colours into my photos. That makes so much sense!
One question: do you watermark your pictures? Especially product ones? Sometimes I do, sometimes I don’t, mostly because of the hassle of doing it. It’s time consuming. Any tips on doing that as a batch?
xV
Hey Virginia,
I have done watermarks only insofar as adding my website address to all of my blog header images and the occasional quote illustrations. I don’t actually do a watermark over the image in order to stop people from using my images or anything at this point, because I don’t sell them – so I’ve never really worried about protecting them that way. It can be done easily in canva or on picmonkey if you want to though, and I’ve done it in illustrator as well – just by changing the transparency of whatever I’m putting as an overlay or watermark on my image.
Hope that helps 🙂
xo
K
Thanks for the tips & inspiration. I’ve just started getting out with my Canon and will have to try some of these.
You are so welcome, Debbie!
Let us know how it goes, and which tips work for you.
xo
K
Hey Kris!
Thanks for the shout out! Great post and super tips! Sarah really is a profesh, she so knows her stuff! I think your photos and graphics are purr-fect! 😉
xoxoxo
Nancy
Thanks Nancy!
You know how I feel about your fun shots, so I’m happy to be able to show everyone how we can put together a photoshoot without fancy equipment too. Thanks for letting me share your behind the scenes 🙂
xo
K
[…] Pingback: 5 Steps You Can Use to Take Beautiful Blog Photos | Blog Your Voice | Kris With a K | Writing Coach … […]
Great tips! The graphic part of my blogs is what always trips me up. Thanks Kris and Sarah!
Thanks Renia!
I’m going to be working on images & photos a lot more in the coming months. I really should have given myself a full series on images alone, but I’ll likely do a few more posts later on in the year.
xo
K